Top Autonomous AI Agents: Which Platforms Lead the Way
Discover the leading platforms powering autonomous AI agents that plan, decide, and execute complex tasks. Explore how these tools help businesses scale smarter and faster in 2026.
Apr 10, 2026


If you're launching a print-on-demand store, setting up Printful with Shopify is one of the first things you’ll need to tackle. And luckily, it doesn’t take a whole weekend. With the right steps (and no shortcuts), you can get your store connected, push your first product live, and have everything syncing in under an hour.
But here’s the thing – there are a few spots where people get stuck. Products not showing up, orders not syncing, payments failing silently. Nothing dramatic, but enough to throw off your launch. So in this guide, we’ll walk through the connection process clearly, and I’ll point out a few avoidable mistakes along the way.
Let’s get your Printful and Shopify setup dialed in the right way, from the start.
Printful is your fulfillment backend. It handles the printing, packing, and shipping of your custom products. Shopify is your storefront. It manages listings, payments, and customer experience.
When both tools work together smoothly, orders move automatically from your store to production, then straight to your customer.
The catch? Miss a step during setup, and that smooth flow turns messy. I’ve seen products disappear, orders get stuck in limbo, and payments fail without warning. Most of it comes down to small missteps during the initial connection.
So we’ll go step by step, and I’ll flag what to look out for.
You don’t need much to get started, but a few things should be in place before you connect anything.
Getting these sorted ahead of time saves time later when Printful starts asking questions.
This sets the tone without sounding stiff or robotic. It feels like a real person is walking you through the process, which matches the voice of the rest of your article.
Let me know if you'd like something more technical, more casual, or something in-between.
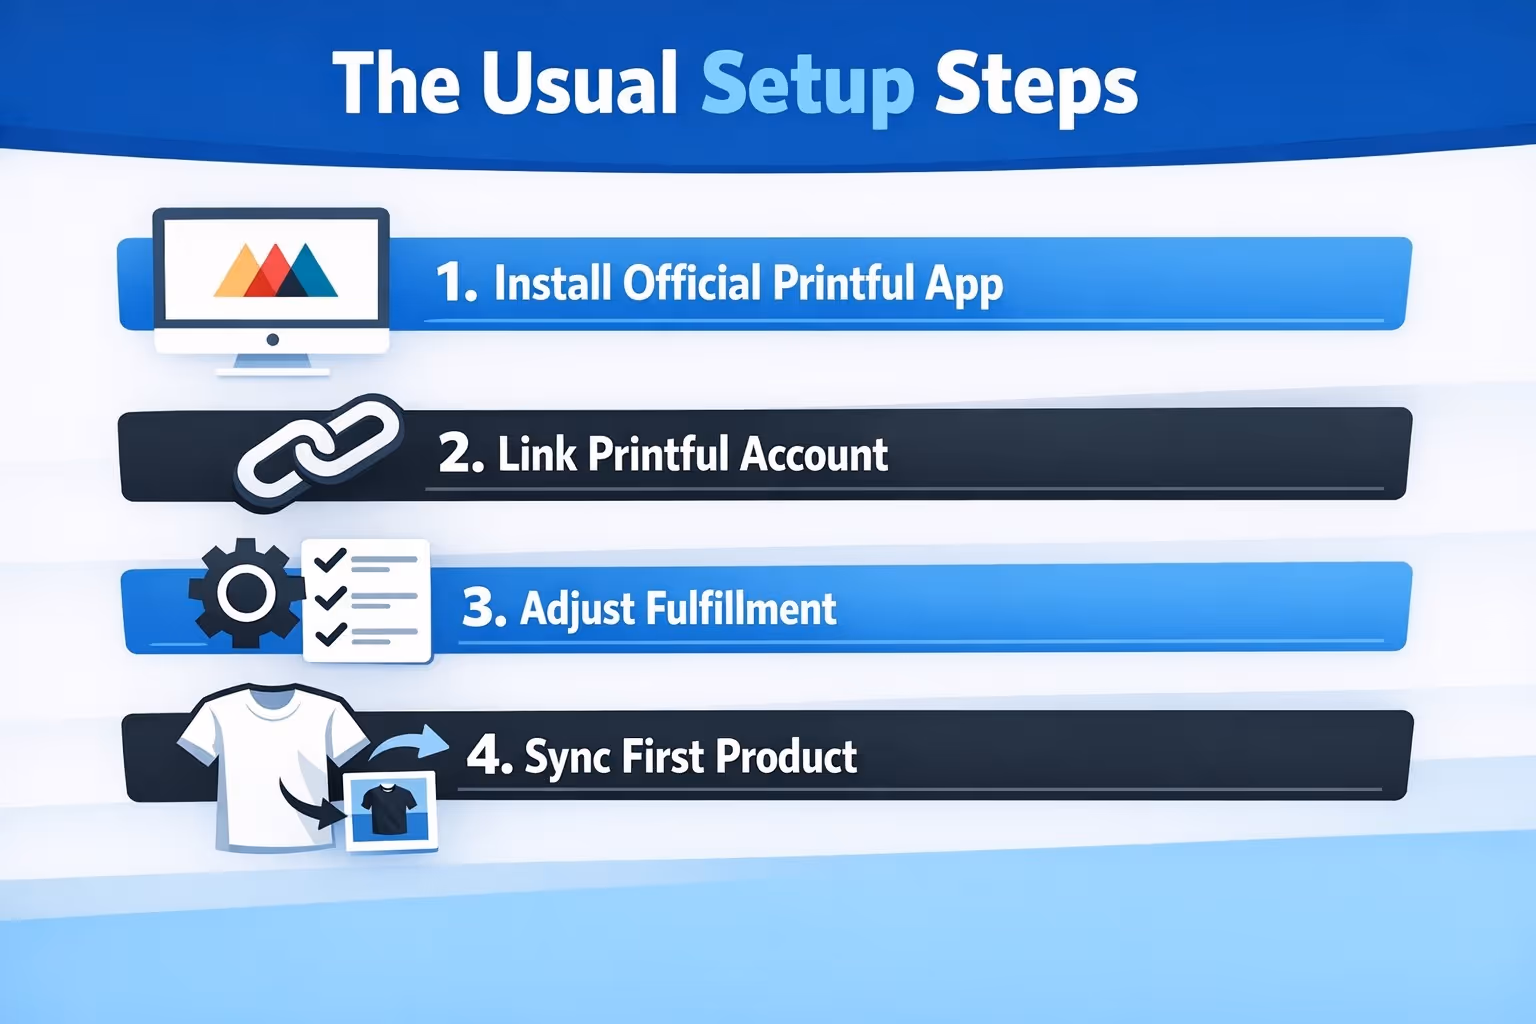
This part is easy to rush, but there’s one rule here: make sure it’s the official app. Search “Printful” in the Shopify App Store, and look for the developer listed as Printful. Avoid third-party lookalikes.
Here’s what to do:
Once installed, Shopify will automatically redirect you to Printful to continue the connection.
When Printful opens, you’ll either log in to your existing Printful account, or create a new one (free, fast, no credit card needed).
Right after logging in, you’ll be asked to authorize the connection between your store and Printful. This is what lets Printful sync your products, inventory, and order data.
Tip: If you manage more than one Shopify store, double-check you’re connecting the right one. It’s a surprisingly easy mistake to make, and a huge pain to undo.
Once connected, you’ll see your store listed in the Stores tab inside Printful.
At this point, the two platforms are technically linked but don’t walk away yet. There are a few settings worth tuning to avoid confusion later.
Key things to check:
You’ll find all of this under Printful > Settings > Orders.
If you skip these, your first real order might get stuck, or worse, go unnoticed.
This part’s fun (and important). It’s where your designs become real products inside your Shopify store.
Here’s the process:
Printful will usually create the product listing in Shopify with images, variants, and pricing, but you should always check if all variants were successfully published.
What is automatically synced: product title, description, images and mockups, pricing, variants (like size and color), inventory, and SKUs.
What is not automatically synced: product type, tags, SEO settings, collections, and categories.
So after pushing your product live, head back to Shopify to clean up those extra details, especially if you care about SEO or organizing your store well.
Before you promote anything, try this:
This test catches small issues before they become real problems.
Common red flags:
Most of these are caused by variant mismatches or edits made in the wrong place. That brings us to the next section.
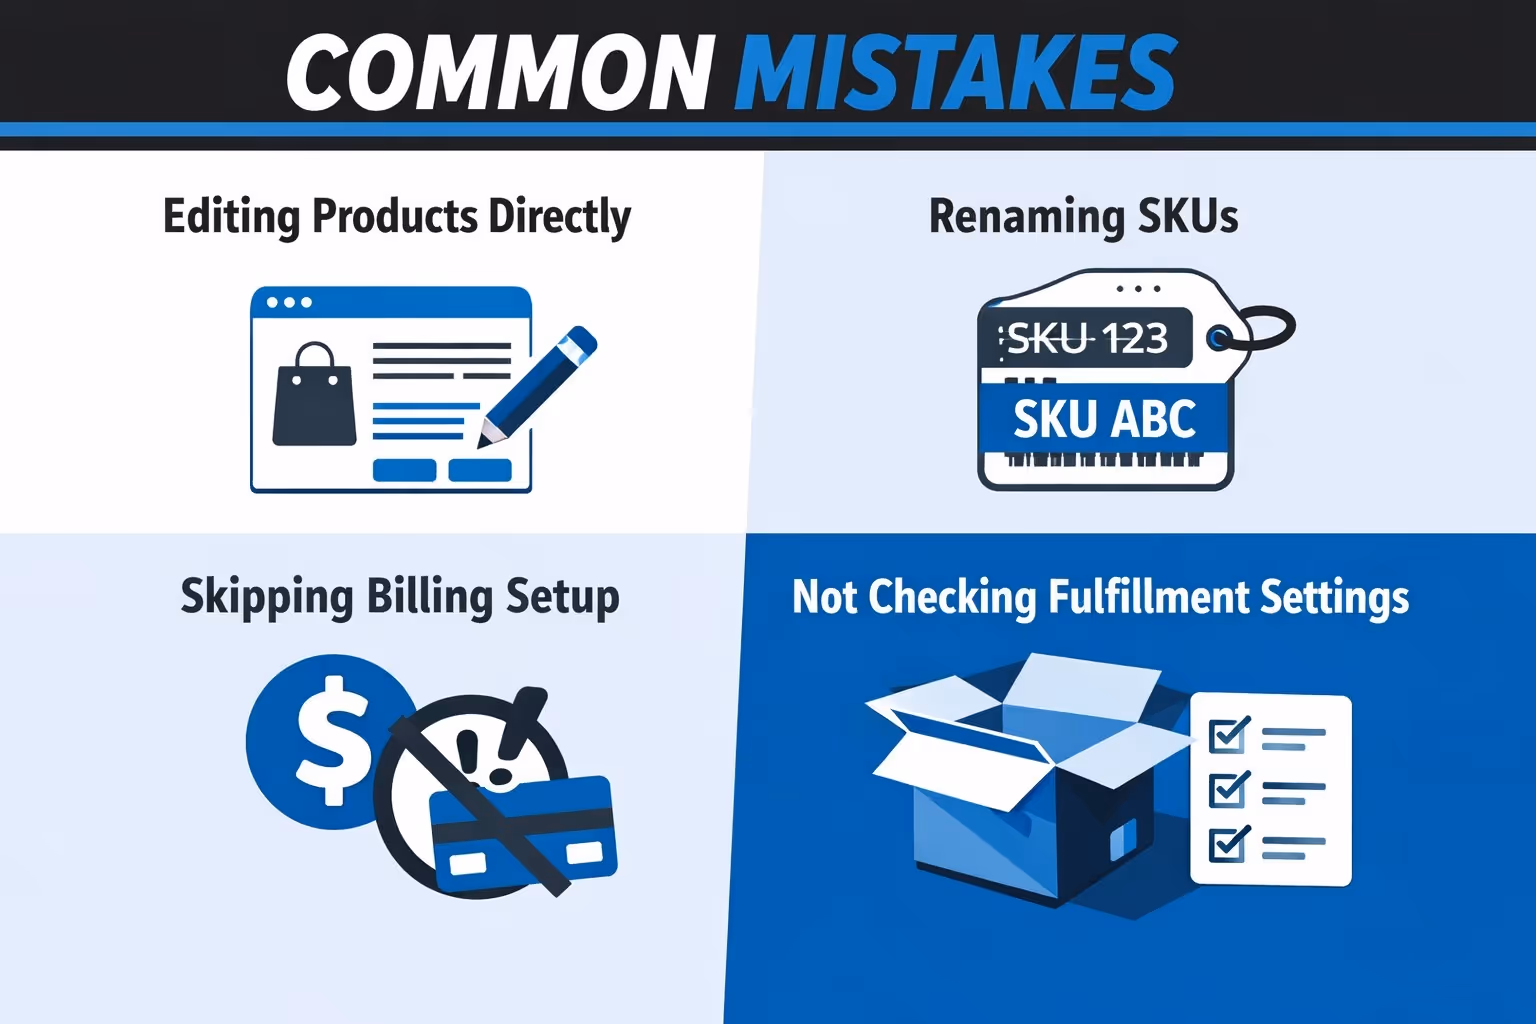
Based on way too much trial and error, here are the pitfalls worth avoiding:
It’s tempting to tweak product names or rearrange variants inside the Shopify dashboard, especially when you’re in a hurry. But the moment you do that, Shopify and Printful can fall out of sync. Printful relies on those original SKUs, variants, and structure to track and fulfill each item correctly. If you need to make changes, always go back to Printful, make the updates there, and then re-publish to Shopify. That keeps everything connected under the hood.
SKUs are like the ID tags that keep Shopify and Printful talking to each other. If you rename or delete SKUs in Shopify, Printful may not receive the order at all because it won't recognize the item. To keep the sync intact, always manage product edits within Printful.
This one’s easy to overlook. You might be focused on products and design, but Printful can’t fulfill anything until they know how to charge you. If your billing method isn’t set up properly, orders just sit there. You don’t get notified in a loud or obvious way – it just quietly stalls. So before you promote your store or launch a product, double-check that you’ve added a credit card, PayPal account, or funded wallet in your Printful billing settings.
Printful lets you choose between automatic fulfillment and manual approval – with additional control over whether to fulfill only paid orders or all orders. Make sure to choose the mode that fits your workflow. That’s great for full control, but also easy to forget about. If you leave this setting on manual approval and then walk away thinking everything’s automated, your orders won’t move until you manually click to approve them. If you prefer a hands-off workflow, head to Printful’s order settings and enable auto-fulfillment from the start.
Here’s how a normal order moves through the system:
No need to touch anything, unless you want to step in.
You can always review orders, stop fulfillment, or refund directly from either dashboard.
Printful gives you a few simple ways to make your packaging feel more like “you” and less like a third-party warehouse.
You can:
These options help you build a brand that feels polished, even when you're not handling fulfillment.
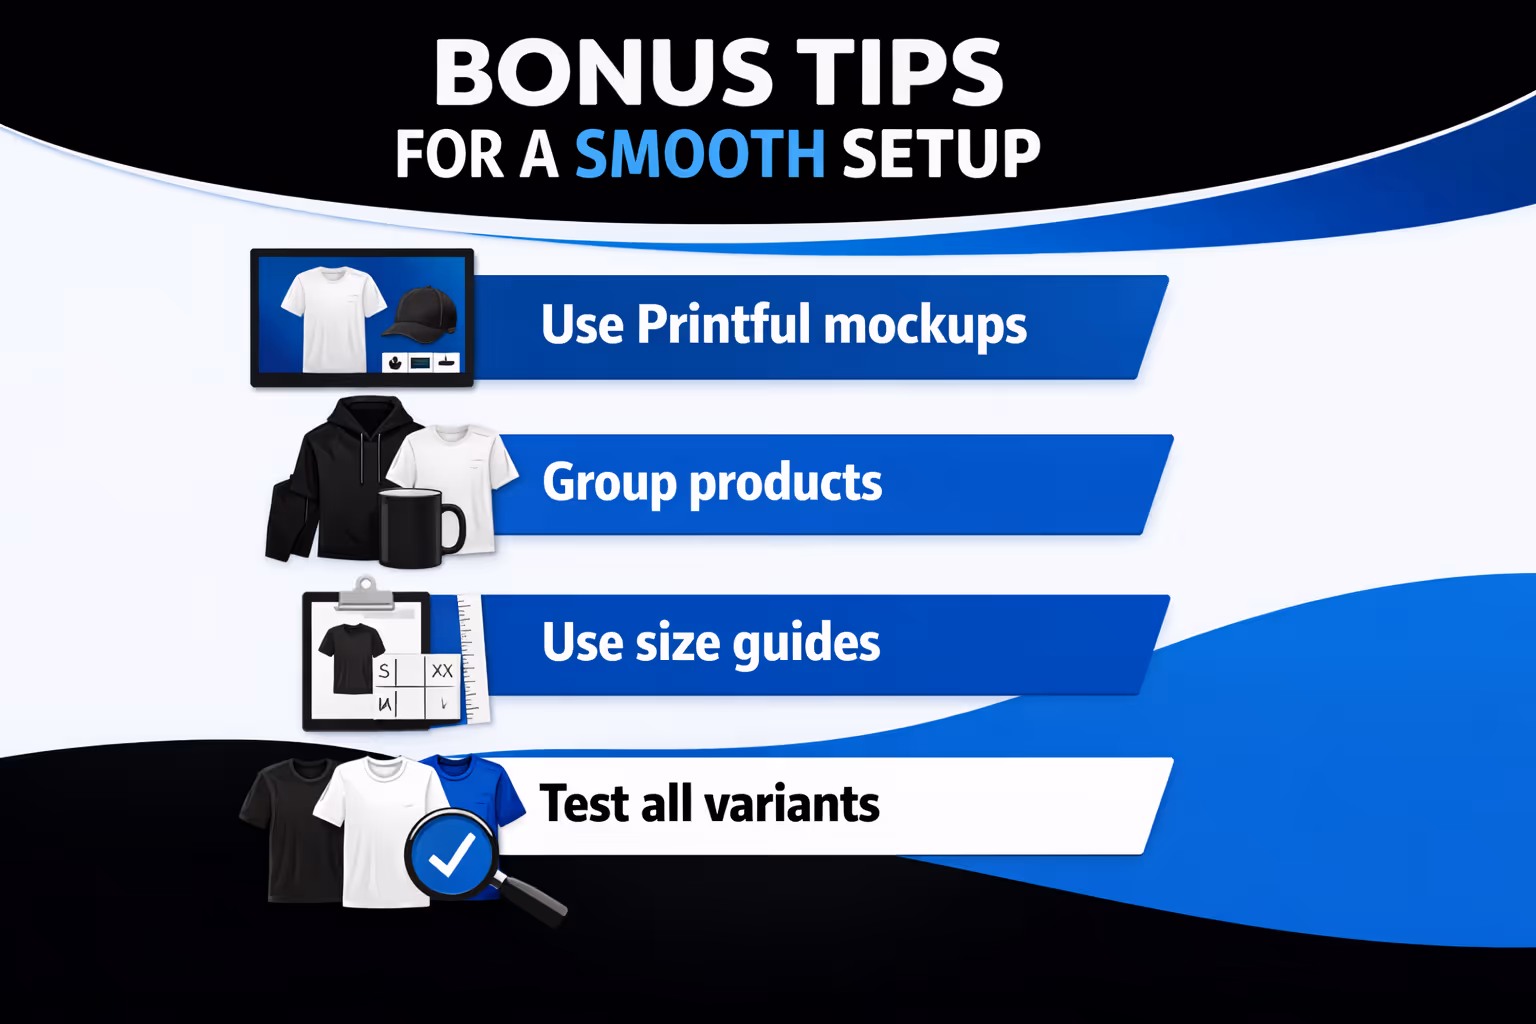
These aren’t must-dos, but they’ll definitely save you time, keep things cleaner, and help your store run more smoothly as you scale:

Once your store is connected and your first product is live, the next question hits fast: what ads should you run? That’s where we come in. At Extuitive, we help Shopify brands figure out which ads are likely to convert before spending a dollar on traffic. Our AI-powered engine predicts real-world ad performance using models that have been trained and validated on live campaign data.
Instead of guessing which creatives or angles will land, you can test ideas through our prediction engine and focus only on ads with high conversion potential. You’ll spend less time split-testing and more time scaling what works. It’s fast, integrated, and built for ecommerce teams that want answers quickly.
You can connect your Shopify store directly to Extuitive for automated product and audience analysis. If you're serious about performance and want better ROAS without burning a budget, we’re here to help.
Connecting Printful to Shopify isn't hard, but it's also not something to rush. Most of the time, issues don’t show up until orders start rolling in. By then, fixing things takes longer and affects real customers.
If you take 30-45 minutes to follow the setup process carefully, check your sync, and tune your settings, you’ll avoid 90% of the headaches most beginners run into.
So go ahead, get your store live, and launch that first product. The tech part’s handled. Now the real work – marketing, testing, iterating – can begin.


