How Does Shopify Make Money? A Simple Breakdown
A clear look at how Shopify makes money, from subscriptions to transaction fees and merchant tools that scale with store growth.
Jan 26, 2026


If you've spent enough time inside your Shopify admin, you’ve probably bumped into metafields at least once – maybe in your product settings, maybe in the theme editor. And if you’re like most store owners, your first reaction was probably something like: “Cool... but what do I do with these?”
This article is here to answer that. We’re going to break down what metafields are, why they exist, and how real businesses use them to make Shopify work better for their specific needs.
Think of metafields as custom data fields you can add to your Shopify store. They’re not visible by default, but they let you store and manage details that Shopify doesn’t include out of the box.
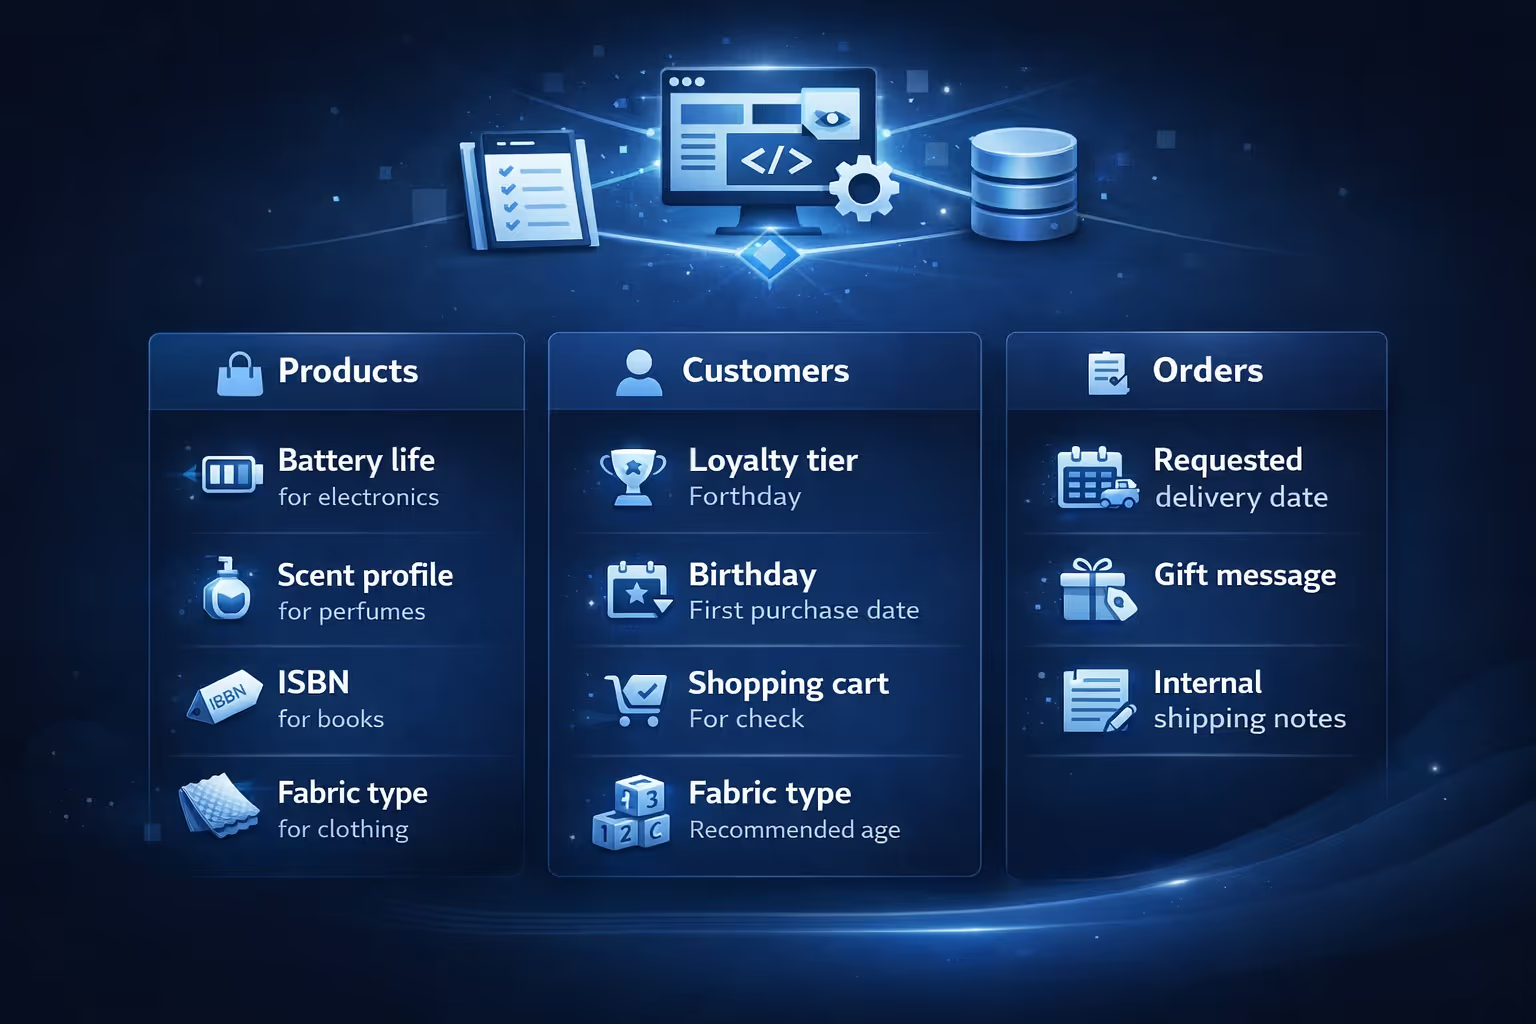
For example:
Shopify gives you the basics (title, description, price), but metafields are where you put everything else that makes your products unique.
You can add metafields to a lot of places:
If it’s a core part of your store, chances are you can attach metafields to it.
You might wonder, “Why not just include more fields by default?” The answer is pretty simple: every business is different.
One store might want to list ingredients. Another might want to show materials, certifications, or battery life. A B2B shop might need to label every customer with a contract start date. Shopify can’t possibly predict what every store needs.
Metafields solve that problem. Instead of bloating the platform with thousands of one-size-fits-all fields, Shopify gives you a flexible way to build your own.
Let’s get practical. Here’s what metafields look like in the wild.
You’re not limited to just storing this data either. You can use it to display things on product pages, build automated flows, filter items in your admin, or create smarter collections.
When you set up a metafield, you don’t just make a blank space. You tell Shopify what kind of data will live there. This is called a definition, and it makes everything work more reliably.
Here are a few common types of metafields you might use:
You can also nest more advanced content with metaobjects, but we’ll touch on those later.
If you’ve categorized your products properly, Shopify may automatically suggest category metafields. These are pre-built fields tailored to that product type.
Say you add a shirt and assign it to Apparel & Accessories > Clothing > Tops > Shirts. Shopify may suggest relevant category metafields like size, sleeve length, and fabric type based on the product category you assign. These fields can be added to your store with a few clicks using predefined definitions – no need to manually build them from scratch.
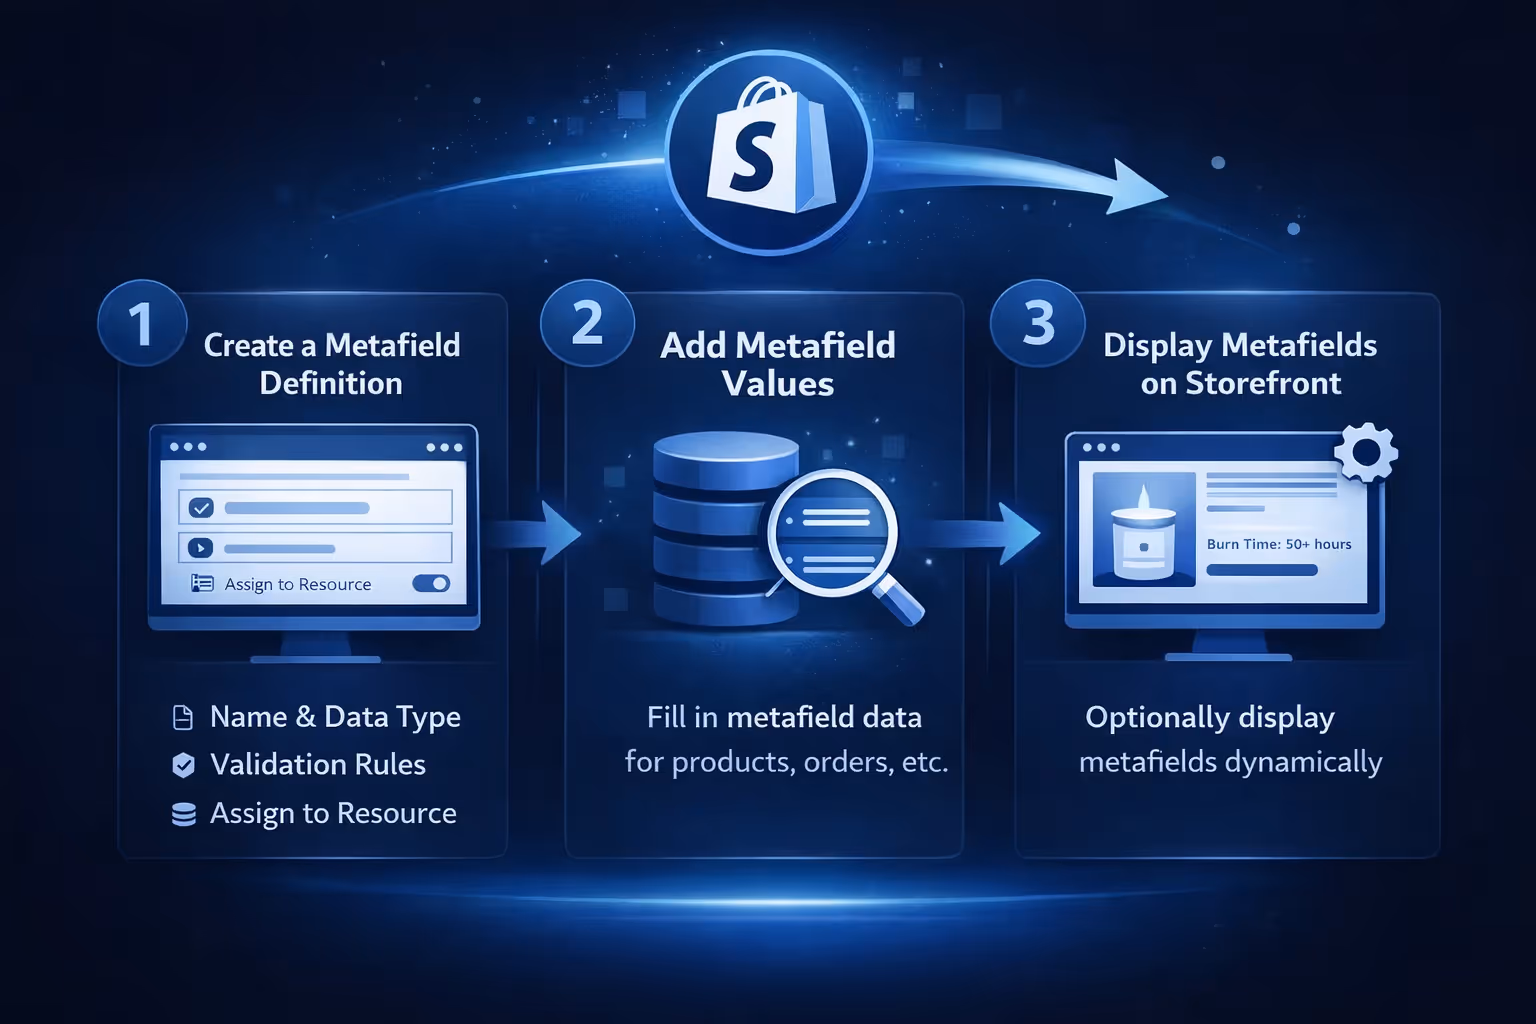
There are a few steps involved in setting up metafields. It’s not hard, but it helps to know the flow.
Start by defining the kind of data you want to store. You’ll:
You do this from the Settings > Custom Data section in your Shopify admin.
Once the field exists, you can start filling it in. Go to a product, collection, or wherever you assigned the metafield, and scroll to the Metafields section.
You’ll see the new field waiting for input.
If your theme supports dynamic sources, you can display metafields on your storefront without touching any code. Use the theme editor to bind dynamic content (like “Burn Time”) directly to a page element.
If your theme is older or doesn’t support dynamic sources, you may need to modify the theme code or use Liquid.
If you use Shopify Flow (available on Shopify Plus and some Advanced plans), you can create workflows that get or update metafields automatically.
Here’s how stores use Flow with metafields:
To use a metafield in Flow, you:
This isn’t something every store needs, but it’s powerful if you’re trying to automate internal tasks.

At Extuitive, we help Shopify brands take their data further. While metafields help you structure custom product or customer info inside your store, we focus on what happens before the sale even begins. Our platform predicts how your ads will perform before you launch them, using AI models that have been trained and validated on real-world campaign results.
Why does that matter here? Because the same mindset applies. When you’re working with metafields, you’re setting up your backend to reflect how your business actually works. With Extuitive, we bring that same level of clarity to the front end of your marketing. You don’t need to gamble on creativity or guess which audiences will convert. You can forecast performance, tweak your campaigns, and scale what’s already working – all before you spend a cent.
If you’re already using Shopify metafields to bring structure to your store, there’s a good chance you’re the kind of brand that wants smarter decisions everywhere. We’re here for that next step.
Let’s be honest: metafields are one of Shopify’s most flexible tools, but they also come with a few gotchas.

Metafields are great, but more isn’t always better. Here’s how to keep your setup clean and scalable:
One underrated feature is that you can now bulk edit metafields directly from the Shopify admin. That means you can update custom data across multiple products, customers, or orders all at once.
You can also filter products based on metafield values. So if you’ve tagged certain products as “Back in Stock Soon,” you can create a smart collection using that tag, or even automate promotions based on those fields.
If metafields are like simple fields, metaobjects are like reusable content blocks.
For example, say you sell wine and want to add winemaker profiles to dozens of products. Instead of repeating the same name, bio, and image each time, you can create a metaobject called “Winemaker,” fill in the info once, and reference it from each product.
They’re more structured and better for managing shared data across your store.
If your store has any kind of custom data, the answer is yes.
Metafields give you control over your content, your workflows, and your storefront without needing to bolt on endless apps. They make your Shopify store fit your business, not the other way around.
You don’t need to learn everything at once. Start simple. Add a metafield for product “care instructions” or a customer’s “account type.” Then build from there.
Eventually, metafields become one of those tools you didn’t realize you needed, and now can’t imagine running your store without.


