Shopify Retail Marketing Strategies for Unified Growth
Practical Shopify marketing strategies for retailers: SEO, omnichannel tactics, email flows, and unified customer experiences for online and local shops.
Mar 24, 2026


If you're running Google Ads for your Shopify store but not tracking conversions properly, you’re flying blind. It's not enough to know your ad got a click – you need to know if that click turned into a sale, a sign-up, or any action that matters to your business. That’s what conversion tracking is for.
In this guide, we’ll walk through how to connect your Shopify store to Google Ads so you can actually see what’s working. Whether you're looking for the quick setup using Shopify's Google App or prefer to go the manual route for more control, we’ll cover both plus how to test it all so your data’s not just flowing, but useful.
If you're spending money on ads, you should know exactly what that investment is doing for you. Conversion tracking gives you that visibility. It ties actions taken on your Shopify store back to specific Google Ads clicks.
Without it, you're guessing. You might keep putting budget behind campaigns that look good on the surface but don't lead to any real results. Worse, you might kill off campaigns that are actually working, just because you're not seeing the full picture.
Here’s what you gain when conversion tracking is set up properly:
So let’s talk about how to get all that working.
There’s more than one way to connect Google Ads conversion tracking to your Shopify store. Whether you're a hands-on marketer or someone who prefers a plug-and-play setup, there's an option that’ll work for you.
If you’re looking for speed and simplicity, this is the fastest way to get Google Ads conversion tracking up and running on Shopify.
Head to your Shopify admin, open the App Store, and search for the 'Google & YouTube by Shopify' app. It’s free and built specifically for syncing your Shopify store with Google tools like Ads and Merchant Center.
Click Install, review the permissions, and confirm.
Once the app is installed, log in with the Google account tied to your Ads profile. You’ll go through a couple of prompts to give permissions and finalize the connection.
This step helps sync your product feed so that your store’s catalog is available to Google. If you already have a Merchant Center account, you can link it. If not, the app will help you set one up on the spot.
Once you've connected your Merchant Center via the Google & YouTube app, product feed sync happens automatically. The connection with Google Ads is handled through the app’s backend, and you typically don't need to link anything manually under Data Manager unless troubleshooting advanced use cases.
At this point, you’ll see a success message saying your conversion tracking setup is active.
Go to your Google Ads account and open the Goals section. You should see a conversion action named something like “Google Shopping App Purchase.” This is the automatic conversion event Shopify created through the app.
To test it, you can either place a real order or use Google’s Tag Assistant tool to confirm the tag is firing.
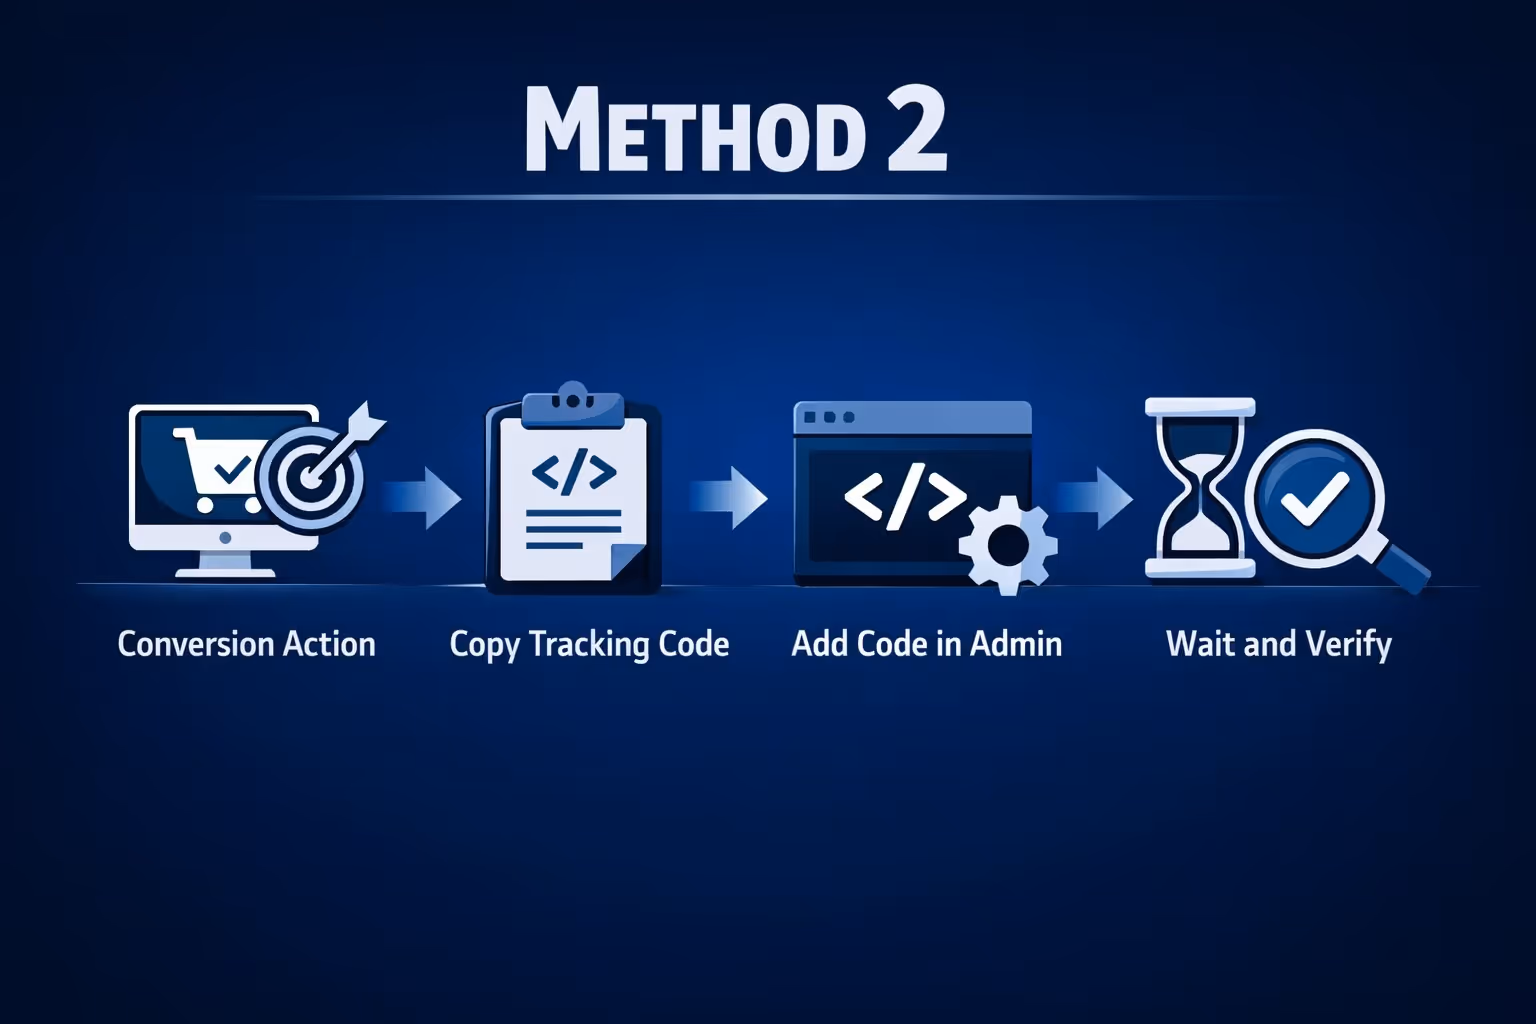
Want more control over what you track and where? The manual method gives you flexibility. You’ll set up conversion actions in Google Ads, generate the tracking tag, and paste it into Shopify yourself.
Go to Tools > Conversions > New Conversion Action. Choose "Website" as the source.
You’ll then define:
Keep "Primary action used for bidding" selected unless you’re setting up a backup tracker.
After saving your settings, Google Ads will give you a tag setup screen. Select “Use Google Tag Manager” or “Install the tag yourself.”
Copy the Conversion ID and Conversion Label. You’ll need these to generate your script.
Use a code generator to create your pixel. Paste in your ID and Label, and it’ll spit out the final code.
Go to Shopify > Settings > Customer Events > Add Custom Pixel.
Name your pixel (ideally match it to the Google Ads event name), delete the default script, and paste your new code. Save and click Connect. Review and accept the Terms of Service if prompted.
Once done, you’ll get a confirmation message like “Pixel connected.”
This new pixel may show as "inactive" in Google Ads until someone triggers the event. Give it 24-48 hours and test with a real or test purchase. Eventually, your Summary dashboard should show activity.
For redundancy, many performance marketers recommend setting up both tracking methods – app-based and manual – at the same time. Just make sure only one is marked as “Primary” for bidding in Google Ads, and set the other as “Secondary” so you don’t double-count conversions.
This gives you backup data if one system ever goes down or misfires.
Once your conversions are being tracked, the real work begins: figuring out what to do with all that data.
Here are a few ways to make your Google Ads smarter using what you’ve learned from Shopify conversion tracking.
Not all clicks are created equal. Look at which campaigns, ad groups, or keywords lead to the most conversions at the best cost-per-conversion rate. Move the budget toward those and trim the rest.
Sometimes mobile outperforms desktop. Or your buyers convert better on weekends. Look at device and time data and adjust your ad schedules or bid modifiers accordingly.
Once you have enough conversions logged, unlock automated bidding options like:
These let Google’s AI adjust your bids based on real-time signals and conversion potential.
Run multiple versions of ads or landing pages and track which ones actually convert. Let the data guide which elements stay and which get scrapped.
If someone viewed a product or started checkout but didn’t convert, they’re already familiar with your brand. Use your conversion tracking data to build remarketing lists and pull them back in with a reminder or discount.

At Extuitive, we believe tracking conversions is just step one. What really moves the needle is using that data to create smarter ads before you ever spend a dollar. That’s exactly what we help Shopify brands do.
Once your conversion tracking is set up and you’ve got some data flowing in, we step in to shorten the feedback loop. Our AI agents are built on real consumer behavior models and can test your ads virtually against this massive pool. You’ll see predicted purchase intent, audience fit, and creative performance insights in minutes, not weeks. That means you can skip the guesswork and move directly into scaling what works.
Instead of throwing budget at unproven ideas, we help you validate ad concepts, visuals, and copy up front, so by the time you launch, you already know which message resonates. And because we’re directly integrated with Shopify, setup is quick, and launching high-performing ads becomes part of your workflow, not a separate project. If conversion tracking tells you what happened, Extuitive shows you what to do next.
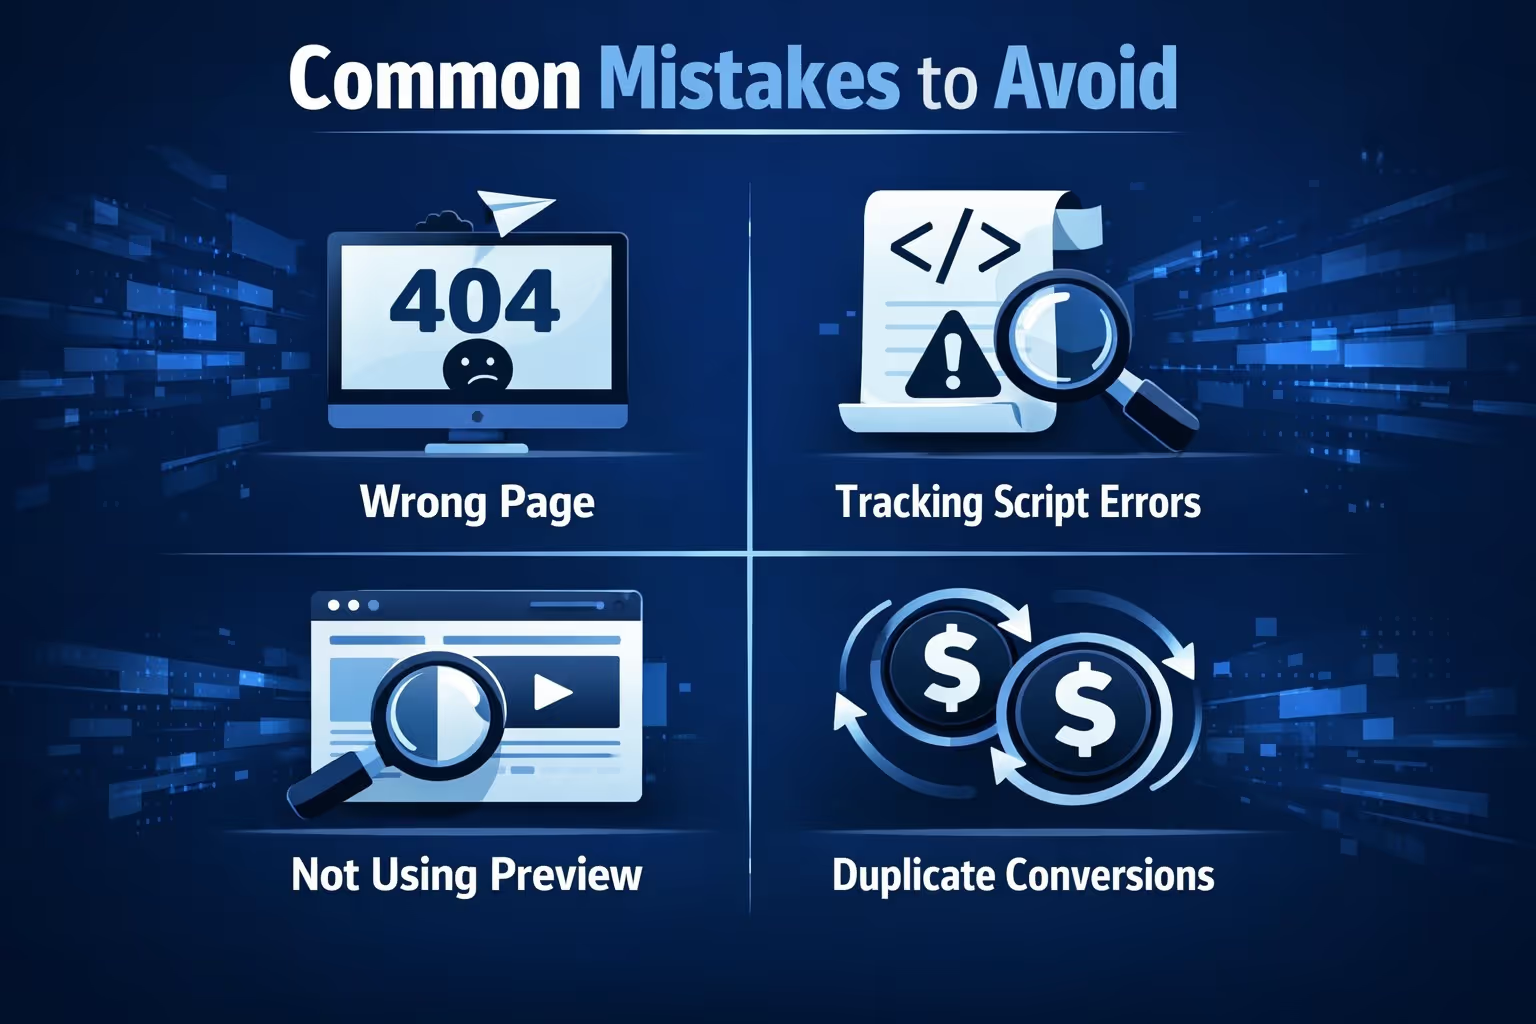
Even a small misstep in setup can mess with your data. Watch out for these:
Check your Google Ads Summary dashboard often, especially after making changes.
Google Ads conversion tracking on Shopify isn’t just a technical add-on – it’s a critical part of running paid ads that actually pay off. Once it’s set up properly, you’ll stop making blind decisions and start doubling down on what works.
You don’t need a full dev team to do it either. The Shopify Google App gets you live fast, and the manual pixel setup gives you flexibility if you need more control. Set it up once, test it properly, and then use the insights to grow smarter, not just bigger.


